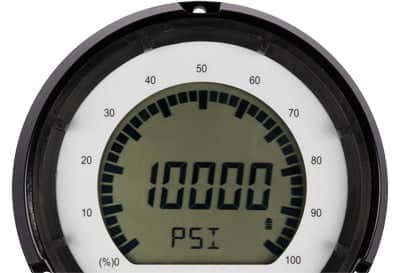
 In addition to being able to perform a quick pressure calibration, our digital pressure gauges with analog outputs allow you to calibrate the signal endpoints. This feature can be extremely useful when you are wiring the output to a panel meter or logic controller. Consider the following:
Bob, a process control engineer, has just installed a 100 psi digital pressure gauge on a pipe. In addition to the display on the gauge itself, the gauge has a 4-20 mA output that he plans to wire into a logic controller.
Before he finishes wiring, Bob checks the accuracy of the output with a panel meter. At 0 psi he expects the output to be 4.00 mA. Yet, the panel is displaying 4.07 mA. Bob does not accept this discrepancy. How does he fix it?
Luckily for Bob, his PG7 gauge allows him to calibrate the signal endpoints. He uses the following instructions:
Note: This example uses the PG7 Digital Pressure Gauge. The PG10 has slightly different buttons, but the process is similar. The PG5 does not have this capability.
Step 1: Use a calibrated meter to monitor the analog output signal.
Step 2: Force a low analog output signal (i.e. 4mA or 0V) either by adjusting the applied pressure or by adjusting the Analog Set points.
Step 3: Press the On/Off button once to enter the main setup menu.
Step 4: Press (Z) to cycle through the options until Output is displayed.
Step 5: Press (S) to access the Output Settings Menu
Step 6: Press (Z) to cycle through the setup options until AL CAL is displayed.
Step 7: Press (S) to access the Analog Low Calibration value. A 5-digit number will appear with the first digit flashing.
Step 8: Press (Z) to change the value of the flashing digit.
Increasing this 5-digit number will increase the output signal. Changing the digit farthest to the left will produce the coarsest adjustment, while each successive digit moving to the right will cause subsequently fine adjustments to the output signal.
Step 9: Press (S) to accept the value of the flashing digit and advance to the next digit. Repeat steps 6 and 7 until the desired Analog Output signal is displayed on the meter. After the last digit is accepted by pressing (S), the display will return to the output menu.
Step 10: Press (S) to re-enter the Output Settings menu.
Step 11: Press (Z) to cycle through the options until AH CAL is displayed.
Step 12: Repeat steps 5-7 to adjust the Analog High Calibration value.
Step 13: To exit the output menu, press (Z) until EXIT is displayed and press (S) to exit to the main setup menu.
Within just a few moments, Bob’s panel meter is displaying 4.00 mA at a reading of 0 psi. Perfect.
If you need help calibrating an analog signal, or if you have any questions, just let us know and we will be glad to assist you.